
Screen Tests and Utilities
Guided display patterns, local generators, lighting tools, and browser-made audio with careful interpretation.

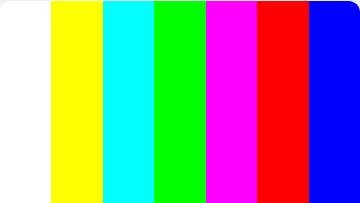




No tools match that search. Try a shorter term or choose All.
Start with the narrowest test that answers the question
Choose Dead Pixel Test when you are looking for a point defect. Choose Screen Uniformity Test when the concern is a broad patch, tint, edge change, or dirty-screen effect. OLED owners can use the OLED Gray Screen Test for near-black transitions that are difficult to inspect with ordinary images. The Monitor Test combines these ideas with gradients, clipping levels, sharpness, geometry, viewing-angle references, and motion.
A browser test can reveal repeatable visual behavior, but it cannot identify a failed component, read panel telemetry, or replace measurement equipment. Treat an observation as useful when it repeats under controlled conditions and is visible in normal content, not merely because a camera can capture it at an extreme exposure.
Generators and practical utilities
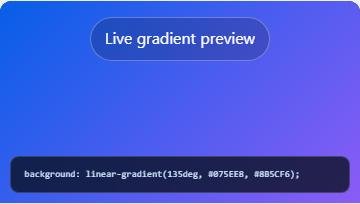
The White Screen Image tool creates a precisely sized local file in PNG, JPEG, WebP, or SVG format. The Gradient Background Generator keeps its preview, copied CSS, and downloaded file aligned to the same colors and angle. Zoom Lighting turns the display into a warm, neutral, cool, split, or soft light source without requesting camera access.
White Noise generates audio in the browser after an explicit Play action. It is separate from the visual Static Screen: one produces audio noise and ambient sound textures, while the other draws television-style pixels on Canvas. Audio begins at a conservative level, stops when the page is hidden, and should still be adjusted with the device’s physical volume controls.
A repeatable inspection routine
- Allow the display to reach its ordinary operating state, then record the brightness preset, color mode, room light, connection, and viewing position.
- Clean only if needed and only according to the manufacturer’s instructions. Dust and fingerprints can resemble pixel or coating defects.
- Run the relevant pattern at native scaling. Compare more than one level, then confirm the observation in ordinary content.
- Repeat after changing one variable at a time. If a new product appears defective, document what you can see without dismantling it and consult the seller or manufacturer during the applicable return period.
The 15-minute monitor inspection checklist turns these steps into a practical sequence.
Choose the next tool from the symptom
| Visible symptom | Best first route | Reason |
|---|---|---|
| One fixed dot | Dead Pixel Test | Nine solid fields isolate point behavior |
| Dark edge, patch, or tint | Screen Uniformity Test | Multiple neutral levels and a region guide |
| Near-black OLED columns | OLED Gray Screen Test | Calculated 1–50% gray sequence |
| Abrupt tonal steps | Monitor Test | Separate grayscale, RGB, banding, and endpoint stages |
| Background asset needed | White Image or Gradient Generator | Consistent local export rather than diagnosis |
Document a result that another person can reproduce
Record model, connection, resolution, refresh rate, scaling, browser, picture mode, HDR state, physical brightness, room light, viewing distance, and pattern name. Describe a location with the nine-region grid instead of only attaching a close photograph. When comparing two displays, change one variable at a time and exchange their cables or source ports before assuming the panel is responsible.
Use ordinary content as the final check. A pattern can reveal a subtle characteristic, but the practical weight depends on whether it affects the work or viewing the display was bought to perform. Contact the manufacturer for tolerances and warranty decisions; ScreenOrbit does not grade panels.
Use this page for one clear task
Match a visible display symptom with the narrowest useful browser test or local utility. New display owners, support teams, reviewers, and technicians use this hub to select a repeatable first check. Write down the result you need before you follow a link or change a setting. A narrow goal saves time and keeps the final decision tied to evidence.
Read the full page once before acting when the task involves a display test, cleaning step, simulation, file right, privacy request, or support report. Then return to the exact section needed for the work. Keep the stated limits visible while you decide the next step. This route focuses on: Match a visible display symptom with the narrowest useful browser test or local utility.
Prepare a stable starting point
Record model, resolution, scaling, refresh rate, HDR state, picture mode, room light, and viewing distance. Record the starting state before you change a control, move a device, submit a form, or rely on a policy statement. Use current source material and the current page version for any formal review.
Keep one issue per session or message. Separate a visual symptom from a hardware claim. Separate a browser simulation from a system event. Separate a generated file from third-party material placed inside the file. These boundaries make the evidence easier to assess. The main route risk is: Changing several settings together hides the cause of a difference and weakens a support report.
Follow a practical four-part process
- Define the goal. Match a visible display symptom with the narrowest useful browser test or local utility. Stop if the task changes into a different problem.
- Capture the baseline. Write down the exact pattern, level, location, and whether the observation appears in ordinary content. Use exact values and names where they exist.
- Check the main risk. Changing several settings together hides the cause of a difference and weakens a support report. Correct the setup before repeating the step.
- Choose the next action. Use the 15-minute monitor checklist when you need a full first-day sequence. Keep the original record for comparison.
Build evidence another person understands
Write down the exact pattern, level, location, and whether the observation appears in ordinary content. Add the date and the page URL. Remove passwords, addresses, serial numbers, payment data, private messages, and confidential logs before sharing a screenshot or report. A short written sequence often carries more value than one close photograph.
For a comparison, repeat the same order and keep every unrelated variable stable. For a policy or rights question, quote the exact file or clause in your own words and link the source. For a bug, include expected behavior, observed behavior, and the smallest reliable reproduction path. This route asks you to record: Write down the exact pattern, level, location, and whether the observation appears in ordinary content.
Avoid weak evidence and unclear claims
- Changing several settings together hides the cause of a difference and weakens a support report.
- Browser patterns support observation. They do not inspect electronics or decide warranty status.
- Avoid several setting changes between the baseline and the result. Preparation for this route: Record model, resolution, scaling, refresh rate, HDR state, picture mode, room light, and viewing distance.
- Avoid a private or model-specific claim without a current primary source. The page limit is: Browser patterns support observation. They do not inspect electronics or decide warranty status.
- Avoid private data in public screenshots, links, examples, and support messages. The useful evidence is: Write down the exact pattern, level, location, and whether the observation appears in ordinary content.
- Avoid treating a search result, camera image, or forum comment as final proof. The main risk is: Changing several settings together hides the cause of a difference and weakens a support report.
Move to the next useful action
Use the 15-minute monitor checklist when you need a full first-day sequence. Keep the baseline and the page limit beside the result. Contact the relevant maker, seller, platform, specialist, rights holder, or ScreenOrbit editor when the decision falls outside the page scope.
Questions about Screen Tests and Utilities
What is the main purpose of Screen Tests and Utilities?
Match a visible display symptom with the narrowest useful browser test or local utility. The page keeps the task narrow so you reach a useful next action without mixing unrelated intent.
Who should use Screen Tests and Utilities?
New display owners, support teams, reviewers, and technicians use this hub to select a repeatable first check. Start with the stated task and use the linked route or policy for the next decision.
What should you prepare before following Screen Tests and Utilities?
Record model, resolution, scaling, refresh rate, HDR state, picture mode, room light, and viewing distance. Keep the starting state stable and write down any change you make during the process.
What information should you record for Screen Tests and Utilities?
Write down the exact pattern, level, location, and whether the observation appears in ordinary content. Specific details help another person repeat the same check or review the same request.
What common error weakens the Screen Tests and Utilities result?
Changing several settings together hides the cause of a difference and weakens a support report. Pause when the context changes and restart from a known state rather than guessing.
What does Screen Tests and Utilities exclude?
Browser patterns support observation. They do not inspect electronics or decide warranty status. Use the stated limit when deciding whether you need a maker, specialist, platform, or legal contact.
Does ScreenOrbit store settings from Screen Tests and Utilities?
Interactive tool settings stay in local browser storage where supported. Supported files stay in the tab. A contact message follows the separate contact and privacy process. Page scope: Match a visible display symptom with the narrowest useful browser test or local utility.
Does Screen Tests and Utilities work on phones and computers?
The written steps work across screen sizes. Browser features differ by device. Fullscreen, downloads, Wake Lock, file access, and audio depend on current browser support. Preparation: Record model, resolution, scaling, refresh rate, HDR state, picture mode, room light, and viewing distance.
How often should you repeat the Screen Tests and Utilities process?
Repeat after a meaningful change such as a new device, display preset, browser, room condition, source, policy revision, or software release. Keep stable conditions for direct comparisons. Record: Write down the exact pattern, level, location, and whether the observation appears in ordinary content.
What should you do after Screen Tests and Utilities?
Use the 15-minute monitor checklist when you need a full first-day sequence. Follow the closest linked route and keep the original goal, evidence, and limits in view.